
Nail art with his own hands have never been so simple: now on sale there is a huge amount of different materials for nail design. In order to look perfect, you just select the desired picture (their great variety: from simple to very complex), and - for the cause.
Painting nails can be performed using a special water-acrylic paints and varnish usual - depending on the desired effect. Of course, initially you may not all be obtained, but in time anyone will be able to perform a truly stylish and sophisticated paintings.
Tools Required
 Depending on the chosen design for nail art can use various tools, from professional to simple, which is in every house. We must not forget the most important - patience and firmness of hand. If these two conditions are met, the following tools will help to create a masterpiece:
* Tweezers
* Nail files
* Multi-colored paints or varnishes
* Needle or toothpick
* Bunch of average thickness
* Fine brush
* Transparent coating.
Step 1
Before proceeding to the actual painting, it is necessary to prepare a "canvas": using tweezers to trim the nails of the same length, then sawing gives them a form of your choice: a round or square.

Step 2
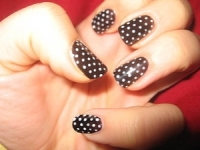
Depending on the image use either a needle or toothpick, or paintbrush. The first option is appropriate if the figure includes the mixture of different colors or one color to another. Needle or toothpick, dip in paint the desired color, apply a dot and blend them so that they have merged with another finish. Having mastered this technique, you create stunningly beautiful and spectacular graphics.
Painting nails for Beginners
For painting nails with flowers, peas, ladybirds, butterflies - in short, more complex patterns, you need a brush of medium thickness. Causing a bit of paint on the nail, mark the outline and shape of the figure. Start with simple patterns, and when you have enough practice, you can create these miniature paintings.

Step 3
To picture not blurry when applying the next layer, be sure to let the lacquer to dry. If time is short, you can use the spray for quick drying varnish.
Step 4
Apply at the picture layer of clear coat: it protects the decorative lacquer, giving it the luster and color enhancing. Wait until the top layer is dry, and your manicure is ready!
No comments:
Post a Comment